
This post may contain affiliate links. For more information please see my disclosure page.
Holy Moly, starting a brand new blog can be SO overwhelming! There is so much information out there and it is so consume everything and research all that you should do within your first few months of starting your blog. You see so many different pieces of advice, do this, do that, you need this, you need that, and so on, and so on.
The first time around I was so overwhelmed trying to figure it all out. I was often side tracked by researching how to do something or what I needed to add to my blog, how to grow my traffic, build my list, and so on and so on. I would spend so much time looking for information, that it would take away form the time I had to actually DO them, and next thing I knew it was hours later and I didn’t even start what I intended to do. I spent all my time lost in a giant swirl of Pinterest pins and informative blog posts instead.
So, this time around, when I started KendraBLOGS, I decided to make a huge checklist of everything I knew I absolutely needed to do to my blog in the first few months to really set it up for success so I could stay on track and really keep myself organized and away from the overwhelm of post after post after post of “how to’s”.
And then just recently, it hit me! This is totally something my readers would benefit from as well! So, I turned it into a giant blog post! Because this post turned into such a massive post, I also created a downloadable version of the post + an easy to follow checklist that you can have available to you as you navigate through your own blogging journey. These resources are only available to KendraBLOGS subscribers, so make sure you sign up below to grab yours!
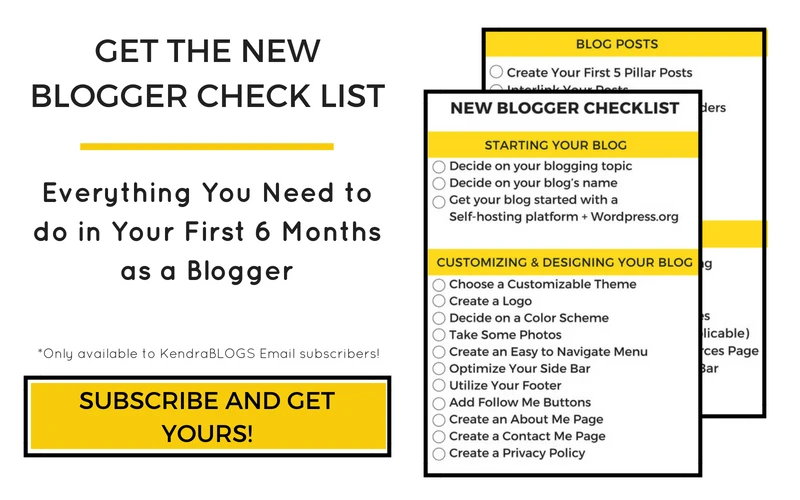
I broke it down into categories for ease of use. Just jump to the section you are looking for help with for easy to follow steps and a list of everything you need to do!
So, I’m just going to dive right in…
The New Blogger Checklist: Everything You Need to Do in Your First 6 Months as a Blogger

*This post may contain affiliate links. Please see my disclosure page for more information.
STARTING YOUR BLOG
1 | Decide on your blogging topic / niche
What are you passionate about? What are your strengths? What skills do you have? How can you turn your passion and skills into a profitable Blog?
A great way to know if your passion can be turned into a blog that makes money, is to find the a cross between your passion, a profitable need, and your strengths. The most important of the two are your passion and a profitable need. You may not be an expert on the topic just yet, but if you are passionate about it, and there is a potential to earn an income from the topic as well, the knowledge and “expertise” will come with time! Especially since you will be blogging about it on a regular basis. The more you blog about that topic, the more you will learn and grow your own knowledge.
For example, you are super passionate about healthy eating, but you’re just not the best cook yet. It’s definitely a profitable niche because others are looking for advice on eating healthy too. So even though you are not the best YET, the more you blog, the more recipes you’ll try, and the more practice you’ll get – and the better you’ll become!
2 | Decide on your blog’s name / some ideas for your domain name
Once you know what you are going to blog about, you have to decide on your blogs name! The key is to choose something that is easy to spell and easy to remember.
Don’t stress too much about getting the perfect name for your blog – what you blog about is much more important than the name you choose. I know many bloggers who get stuck on this step forever. Please don’t do that! The more time you waste thinking of a name, the more time your taking away from actually building your blog and your traffic. Choose a easy to spell and generic blog name and start blogging! My recommendation is to have a name that is easy to remember, and relevant to your blog topic. I also recommend it to not be too long.
Before you move to the next step, grab a pen & paper and brainstorm a few name ideas.
3 | Get your blog started with a Self-hosting platform + WordPress.org
For this step I always recommend getting your blog set up with Siteground, which is a self-hosting platform, and pairing it with WordPress.org, which is the platform you will actually build your blog on.
If you do not have your blog set up yet, I recommend starting with my detailed tutorial on setting up your blog first, and then coming back to this post.
Some other helpful resources on this topic include:
CUSTOMIZING & DESIGNING YOUR BLOG
1 | Choose a Customizable Theme
You will have the option of using a Free WordPress Theme, or purchasing a paid theme. I have used both options, but ultimately found the paid version a lot easier to work with and it obviously had much better features, etc.
Take you time and choose a theme that will do everything you want it to for your blog. I recommend finding a theme that is completely customizable, and EASY to make into your own. I purchased a theme in the beginning of my blogging journey that was very hard to customize, and would have required me to use code to do so, which I do not have any experience with. So, needless to say, I wasted my money on that theme.
I finally found the Tweak Me Theme by Nosegraze, and I love it. It does everything I need it to, and is SO versatile and flexible as far as designing your blog. You can change pretty much everything you want to match your own vision that you have for your blog. And, customizing is SUPER easy. You can find more details on the Tweak Me Theme HERE.
2 | Create a Logo
You will also have to decide on a logo for your blog. You can create your own for free using a resource like Canva, or use a website like Creative Market to purchase a logo template.
3 | Decide on a Color Scheme
Decide on the colors you want to use throughout your blog. Try and stay consistent with 2-3 colors rather than using a whole bunch of different colors which may come across as unprofessional, or clash with each other.
4 | Take Some Photos
While I typically use stock photos for my own blog graphics, I do believe having some good quality photos of yourself is important. You will want them on your about me page, as well as for your Social Media profiles.
If you have the skills, I definitely encourage taking your own photos for your blog graphics as well. It is nice to have unique photos, but not everyone has an eye for photography. If you are someone who does not, there are many free stock photo websites out there as well. I typically use Unsplash.com to find mine.
5 | Create an Easy to Navigate Menu
Something you will want to ensure, is that you have an easy to navigate menu or menus. You don’t want it to be too cluttered, but you want to be sure that you have all of your important links. I like to personally have a contact me link, an about me link, a link to my blog page, and then I have some additional links that I think are important to my niche such as a “start a blog” link, a “blogging toolkit” link which lists all the blogging resources and tools I use, and then I have my “Free Resources” link that prompts people to subscribe for access to free blogging resources.
6 | Optimize Your Side Bar
If you choose to use the sidebar feature, be sure that you are making the most of that space. You want to make it appealing and promote your important pages, posts, and other links such as products, courses, or a special opt-in.
Many people also add their follow me buttons in their side bar, and even use an Instagram or Pinterest plugin to display their feeds and prompt people to follow them.
Others choose to promote affiliate products or ads in their sidebar as well.
7 | Utilize Your Footer
This is a space that often gets overlooked or forgotten, I know I have been guilty of that myself. But, in reality this is something that shows up on every single page of your blog, so why not make the most of that space? You can put your follow me buttons, contact information, and whatever else you think would be beneficial.
This is also a great place to put your copyright information, privacy policy link, and an affiliate disclosure link if applicable.
8 | Add Follow Me Buttons
Like I mentioned briefly above, you will want to have follow me buttons in at least one area of your blog. I have mine in three places: The very top of my blog, in my side bar, and in my footer.
If your theme doesn’t have them included, there are a ton of different plugins you can download.
These are important because you want people who come across your blog and enjoy it, to be able to follow you on other social media platforms to stay up to date on your blog. This will hopefully turn them into a returning visitor, or even a potential subscriber or customer!
9 | Create an About Me Page
An important page to create is your about me page. When people come to your blog and enjoy what they read, they often want to connect with you in some way before subscribing to your list or purchasing a service, product, or course. Having an about me page that talks about your story, and lets the reader know why you are a qualified person to blog about your specific topic, is a great way for them to get to know you. You should also have a photo of yourself, because putting a face to the name helps people connect more as well.
10 | Create a Contact Me Page
Another important page to have on your blog is a contact me page. This is an easy way for people to reach out to you, and it is important that people have that option, and that it is an easy process. This is especially important if you sell products, services, or courses, so that if people have any issues, or if they want to provide a positive testimonial, it is easy for them to reach out to you.
This is also important in situations where people or brands may want to collaborate with you. If it is hard to find your contact information, you may miss out on an opportunity!
11 | Create a Privacy Policy
One more thing you need to ensure you have is a privacy policy available to anyone that views your blog. This is so people are aware of how their information may be used or stored on your website. This is best practice for all bloggers. There are many templates out their that you can use as a guideline.
BLOG POSTS
1 | Create Your First 5 Pillar Posts
Before you officially launch your blog, it is important to write at least 5 posts. You want people to come to your blog, and be interested enough to stay and browse other posts, possibly sign up for your email list, and also want to come back. So if you only have one post, chances are that person will realize you are new, and likely not sign up for your list, and not come back, at least not anytime soon.The best types of blog posts you can write if you’re just starting out, are what are called pillar posts. These are in-depth, and a decent length, and they provide a solution to a problem that your audience probably faces.
2 | Interlink Your Posts
Interlinking your posts simply means linking to other posts on your blog throughout your blog post. Interlinking is great for SEO and it also helps keep people on your blog and reading other content.
It is easy to interlink. All you have to do is include links for other relevant blog posts from your blog within the current post you are writing.
Many times I use interlinking to elaborate on a point or direct people to a post that has further information. So for example, if I am writing a post about driving traffic to your blog, and I mention Pinterest as a tool, I might say something like “You can also check out my post: Grow Your Blog with This Step-by-Step Pinterest Plan, for detailed information on getting started with Pinterest.”
If you don’t have a spot within your blog post to interlink older content, another great option is to simply include a “You May Also Like” section at the end of your post. You can then list a few links to other posts on your blog.
3 | Create Attention-catching Headers
You want your title to be catchy and have the ability to draw people in. With there being SO much information on the internet, you need to figure out how to stand out. Making your title catchy and using wording that pull people in is a great way to make your blog post stand out in the crowd.
You want to create some intrigue in your title to draw readers in. A great example would be these two titles: How to Make Money with Your Blog VS. How I Doubled My Blog Income With This One Amazing Strategy.
Which would draw you in more? Would you feel intrigued to know what that one strategy was?? I know I would!
4 | Use Headers
Using Subheadings helps to break up your post and to avoid your post looking like a giant wall of text. Having Subheadings break up your content makes your post flow nicely and increases the post’s readability.
People also tend to skim and scan blog posts for information, and having subheadings within your post allows your readers to do this. I know I personally skim posts to see if it has the information I am looking for, and if I see a few headings that indicate it does, I read the whole thing.
5 | Focus on Your SEO
With my first blog I did not know anything about SEO and I did nothing to optimize my blog posts for search engines, and I rarely got any traffic from search engines, and almost never ranked in google searches.
Now that I know a bit more about SEO, I realize how much of an impact it can make on your traffic if you make your posts search engine optimized from the very start!
I talk all about the importance of SEO and how you can optimize your blog in this post: Learn SEO: The Beginners Guide to Making Your Blog Search Engine Optimized
6 | Customize Your Permalinks
A permalink is the description that follows your blog URL. In WordPress you can edit this directly under your Title box at the top of your post.
Now, if your permalinks are showing numbers or the date, you can also edit the format so that it shows just the post title. In WordPress you simply go to the settings option on your left side menu >> then hit Permalinks. Then you want to choose the “Post Name” option.
You should include your keyword(s) in all of your permalinks.
7 | Plan Out Your Content
Something I learned the hard way is that planning ahead is VERY important for success and staying accountable. At least, that is my personal experience.
When I create a plan for what content I want to post over 1-2 months, I stay focused and on track, and I am not scrambling to come up with blog post ideas. I try to plan my posts so that they connect or relate to other posts on my blog and are easy to interlink. The way I do that is as I am creating new posts, I jot down ideas that come to mind as I write. Or, if I am writing a post and there is something I would like to elaborate on, but don’t want to go too far off topic in that post, I make a plan to create a whole other post about that topic, and then interlink it once I am finished.
8 | Create a Tracking System
Something I regret not doing with my first blog, is tracking everything! I now have a spreadsheet of all my blog posts by topic, that way I can quickly go through and see which posts would interlink well with other posts and get the most of my interlinking!
I also track all of my stats, income, expenses, affiliate links, etc.
EMAIL MARKETING
1 | Get Set up With an Email Marketing Platform
As a new blogger, if you are going to invest in anything, I would highly recommend a good email marketing platform. Growing your email list from day one is SO important, especially if your long-term goal is to monetize your blog or turn your blog into a business.
If you want to know why having an email list is SO important, you can check out this post: 5 Reasons Every Blogger Needs An Email List + How to Get Started Building Yours Today!
Creating an email list is the best way to communicate with the people who are interested in your blog and what you have to say. They are letting you into their inbox, so make sure you are using that to your advantage. Create a relationship with your email community, build that trust, and provide them with valuable resources.
These people get to know you and what your all about. By creating that strong relationship, your audience will trust you and your judgement when you recommend an affiliate link, or launch a course / product, and are more likely to convert into customers.
I personally use ConvertKit for my Email Marketing Platform and I Really enjoy their features.
For more information on email marketing and Convertkit, check out these posts:
+ A ConvertKit Tutorial: The Beginners Guide to Email Marketing
+ The Ultimate Step-by-Step Guide to Start & Grow Your Email List
2 | Brainstorm Freebie Ideas
So, now that you have an email marketing platform, you need subscribers! I great way to gain subscribers is by offering an incentive to join your list. There are many different kinds of freebies you can offer, from a checklist to a free course.
The key is to tailor your freebie to attract your ideal audience. So, if you blog about healthy eating and meal planning, you may offer a free meal planner template as your incentive to join your email list. This will ensure you gain an audience that is most likely interested in healthy eating and meal planning.
Related Reading: 10 Freebie Ideas to Explode Your Email List
3 | Create Freebie(s)
Once you have some relevant freebie ideas, you will need to physically create them. There are a few different tools you can use depending on what you are offering.
I use Canva to create all of my free digital downloads (checklists, workbooks, ebooks, etc.). I use Teachable to create most of my paid courses, but if I am offering a free email course, I usually just use the Convertkit Sequence feature to deliver the course over a span of however many days.
The last tool I usually use is Google Drive to store my freebies, and then you can use the incentive feature in Convertkit, or simply add the file or link in your email that is delivered to your subscriber. I also have a resource library, and use google drive links that people can click if they want to grab one of the freebies in the resource library.
4 | Create Opt-in Forms for Freebies
Once you have your freebies creates, you need to create opt-in forms to insert into your blog posts so that people can sign up and receive your incentive + join your list. You can use the opt-in forms from your email marketing platform, or use a plugin or third party website such as Lead Pages to create customized and beautiful opt-in forms.
*As per the new GDPR regulations, be sure to include a consent box on your opt-in form so that people have the option to confirm if they would like to receive additional emails from you outside of your initial freebie email. The key here is being transparent in what you will be sending your subscribers should they sign up for your list and how you are using their information. I do not have a post about GDPR regulations, as I am still learning about it myself, but many bloggers do have great guides!
5 | Create a Resources Page (if applicable)
Another great way to capture subscribers is to create a password protected resources library. This may not be applicable to all niche’s out there, but is for most. Basically, whatever you offer as a freebie or opt-in incentive, you include in your resource library. That way people do not have to re-subscribe to get your newest freebie, they can simply head to your resource library and grab it.
To create a resources page, use the page feature in WordPress, and set up your page however you like with links to each of your freebies. Once complete, you can chose to “password protect” the page. Now, you can offer access to your freebie library if people subscribe to your email list.
6 | Create a Landing Page for Resources Page
So, once you have your resource page set up, a great way to promote it is to have a “Free Resources” option in your menu. When people click it, they are brought to a landing page that has a little blurb about how awesome your resource library is, and how it is only available to subscribers. Then, you include an opt-in option for people to sign up. When they sign up, they get an email with the password and link to the freebie library.
To create the landing page you can use the landing page option on Convertkit, or use a website such as leadpages to create awesome landing pages as well.
7 | Create an Opt-in for Your Side Bar
You can also include an opt-in within your side bar. You can create this for your most popular freebie incentive, or for resource page access.
8 | Create a Welcome Sequence
Now that you have started building your email list, you will need to create an automated Welcome sequence. Your Welcome sequence is your first point of contact with a new subscriber, so you want to engage them and show them the benefits of staying subscribed to your list. I use the sequence + automation feature with Convertkit to set up my sequence.
Rather than diving too deep into the importance of a welcome sequence, I am going to direct you to this post: How to Create a Killer Welcome Sequence for Your Email List.
9 | Plan Out Your Emails
One thing I do find about my email list, is that is is very easy to put off sending a weekly email to my list. It is just one of those things that is easy to push to the bottom of your to do list to get other things done. Then, next thing you know it has been over a month and you have not sent any recent emails to your list. I know I have been guilty of that in the past, and it damaged my email list engagement greatly!
So, what I started doing is planning out at least a month worth of newsletter ideas. These are simply ideas that I can write about in an email to my subscribers. If I have some extra free time, I take it one step further and write out a few emails and use the schedule feature in Convertkit to send them out on a weekly basis.
Right now, you can try ConvertKit for FREE with a 14 day free trial! Try it to see if you like it before you commit to the investment!
I highly recommend Convertkit for bloggers at any stage in their blogging journey. It has awesome features that make email marketing a breeze. I even have a free tutorial to get you started! You can find it here.
1 | Create a Pinterest Account
Head over to Pinerest.com and sign up for a free account!
You can head over to this post for lots of Pinterest Tips: Grow Your Blog with This Step-by-Step Pinterest Plan
2 | Switch to a Business Account
Whether you are brand new to Pinterest or you already have an account, the first thing you need to do is switch to a business account. The reason this is SO important, is because with the business account you gain access to all your Pinterest stats and analytics! Having this information allows you to see your growth, your top pins, the people you reach, your daily views and impressions, etc.
It is still completely free to switch to a business account, and you can find the option in your settings area.
3 | Optimize Your Profile
So starting with your profile picture, you want your photo to be clean and professional. A head shot, with a clean, solid background is ideal.
You also want to use keywords in both your “title” and your bio. Ideally your title should appear as follows: Your Name | Blog Name | Keywords. So mine for example would be: Kendra @ KendraBlogs | New Blogger Tips + Blog Growth Strategies. You want your profile to come up when people search for a word related to your blog. So, for example, if your blog about fitness, you would want to ensure the word fitness is included in your title AND bio.
You also want it to be super clear to the people coming across your Pinterest account, what you are all about. So Someone who looked at my profile would know right away that my blog is aimed at new bloggers looking to start & grow their blogs.
Your Bio is the same. You fill in a little blurb about what your all about, and then add 3-5 key words at the end to make your account more likely to come up when people search those words. So, at the end of my Bio I have: Start a Blog + Blogging tips + Grow your blog + Monetize Your blog. Now, when anyone searching those words, I will be more likely to show up!
4 | Create Your Boards
When you create your new account, create 7-10 boards related to your niche, and then ONE board dedicated to only pins from your blog.
Just like in your title and bio, you also want to add keywords to your boards. You simply go into the edit feature and add them under description. Use any relevant keywords that relate to that board.
5 | Create 2 Pinnable Images for Each Post
For every blog post your currently have + any your write in the future, you want to include at least two “pinnable graphics”. This will be a graphic that is ideal in the Pinterest world. You will include it somewhere within your blog post, so that when people want to share your post, there is an image that is made specifically to be shared on Pinterest. If you optimize your “pinnable image”, when it is shared, it has a much better chance of being re-pinned.
You also need a image to share on your “Best of” Board, so you will need to create pinnable images for that anyway! The key is to use long vertical images. I typically use 800 (width) x 1200 (height).
By creating two images, you can A/B Test them to see which style does better.
6 | Follow Bloggers in Similar Niches
Start following other bloggers in your niche, and pinning their pins. Another great tip is to start looking at which group boards they are in. I will talk more about group boards below!
7 | Join GREAT Group Boards
This is a crucial step in gaining traffic and having viral pins. You want to join group boards because if you are just starting out on Pinterest, your following is probably minimal. Being able to pin to a group board, allows you to get your pins in front of thousands of eyes, which in turn brings traffic to your blog! Group boards are also a great way to find relevant pins to pin to your boards, and other people to follow that are in a similar niche!
The key to group boards is joining boards that are relevant to your niche, and that have strong keyword descriptions. Really large general group boards do not tend to do as well or give you as many re-pins. If group boards are accepting contributors, they usually ask that you follow the board, and then email whatever email address is listed in the description, and simply ask to join! In your email you should include your niche, blog URL, and your pinterest URL.
8 | Create a Pinning Schedule that Works for You
I do a mix of manual pinning and scheduled pins using Tailwind. I find this works best for me personally, as I do not always have a ton of time to spend on Pinterest every single day. BUT I find only relying on scheduled pins did not provide me as much traffic.
It was when I started using a mix of manual + scheduled pins as back up for the days I didn’t have much time, that I started seeing a big spike in my traffic. But, you will have to figure out what works best for you.
It was actually the ebook Pinteresting Strategies that helped me really step up my Pinterest game and improve my traffic coming in from Pinterest. I highly recommend it if you are struggling with Pinterest!
9 | Pin From Your Own Domain Often
Something that I found out recently, is that Pinterest LOVES when you pin often directly from your own domain.
They are trying to focus on Business and creators pins more so than personal accounts, and by pinning often from your own domain, you are letting Pinterest know you are either a business or creator.
Pinterest also loves NEW pins, so when you pin directly from your own domain, you are giving Pinterest a new pin!
MONETIZING YOUR BLOG
1 | Get Your Affiliate Marketing Started
If you plan on monetizing your blog, a great way to do that from the very beginning is by using affiliate marketing. It is really the only type of monetization that you can do from the very start, with a small audience, and low traffic.
Most other ways to monetize involve having a larger audience that trusts you. An example would be pitching a course or product. Ideally you launch that to an audience and email list that you have built a relationship with and that trusts you. If you launch it prematurely, you risk having low conversions.
I have a 2 month old blog, and because I have included affiliate links from day one, I have already made $470.00. This is with a small audience (literally less than 100 page views a day in the first month).
I owe my affiliate marketing strategies to the Making Sense of Affiliate Marketing Course, which taught me how to be strategic with my links, and changed the way I used affiliate marketing. The course was worth every penny! To find out more about Making Sense of Affiliate Marketing, click here!
Related Reading: Affiliate Marketing: How to Start Making Money With Affiliate Links
2 | Decide Which Other Streams of Income You Want to Use
Now, affiliate marketing is one of my favorite ways to make an income from my blog, but I believe it is so important to have a few different income streams for your blog.
My plan moving forward with KendraBLOGS is to incorporate affordable digital products and courses for new bloggers. (Stay tuned!). But, there are many different ways to monetize your blog! I actually talk about 6 different options for monetizing your blog in THIS POST.
3 | Make a Plan + Strategy
Once you decide on which methods of monetization you want to use, create a detailed plan for how you are going to achieve that.
If you plan on launching a course, what tools do you need to create it? How long will it take to create? How big will it be? Who is your target audience? Will you pre-sell it? What will you use as a lead magnet? How will you promote it? Etc. etc.
Be prepared!!! Don’t just wing it and expect to have success.
4 | Set Goals
What is your end goal? And what smaller goals can you set to achieve your end goal? What is your timeline? How will you measure the success? Is it realistic and attainable?
Set some SMART goals to help you achieve success.
5 | Track Your Efforts
I cannot stress this enough, create a spreadsheet to track your efforts. I update an excel spreadsheet every month with my income and expenses. It helps to see the numbers, especially as they grow month to month.
OTHER
1 | Connect with Bloggers in a Similar Niche
Forming connections with others bloggers in your niche is so important. You can collaborate and bounce ideas off of each other, share each others content and promotions, and just help each other in general.
It also just helps to have other creative and like minded people in your life to keep you inspired and motivated!
I use Instagram and Facebook groups to connect with other bloggers, and I also find just commenting on blog posts and sharing other bloggers content opens that door for a connection.
2 | Set Up Google Analytics
While I definitely do not believe obsessing over your stats and numbers is something you should do, I do recommend paying attention to your stats! They can really tell you a lot about what is working and not working with your blog. It can also help you pinpoint who your ideal audience is and what they want and need from you.
3 | Do Monthly Reflections
I say this a lot. But, it is because I truly believe reflecting on your monthly numbers, posts, income, goals, etc. can help you create a plan to have an even better month the next month!
When we really reflect and ask ourselves questions such as what worked this month, and what was a flop? And then dig deeper into WHY, we unlock lots of helpful information that can really assist in your blogs success.
I also use monthly reflections to set my goals for the next month. I take a look at where I am currently, and decide where I want to be at the end of next month. Then, I set goals to help me get there.
Lastly, there is just something about seeing your blog grow over the months that is so motivating! When you pay attention to your traffic, subscribers, income, etc. and you see that your stats are increasing every month, that is so inspiring!!
So, there are my personal “must do’s” for new bloggers! This post turned into a monster, and is honestly probably the longest post on my blog to date. But, I love when the information just flows out and becomes a massive and helpful post for you guys! Like I mentioned, I decided to go one step further and give my subscribers the option to download this post as a digital download. That way you can go through it all at your own pace and not become overwhelmed trying to consume this whole post! It will also include an easy to follow checklist to make your first few months as a new blogger much easier!! So, make sure you subscribe to my email list so you can get access to the download + Checklist! You can do that below:
Now, I want your opinion! What did I miss?? What is a must do for new bloggers that I forgot to add in my list? Let me know in the comments below!

this was so helpful! I started blogging in January and still found a lot of useful information here, thank you so much for sharing 😀
Awesome! I am so happy you found some helpful info! I find that with blogging, no matter how long you have been a blogger, there is always more to learn!
This is so helpful. I’ve been blogging for 6 months but there are some good & actionable tips here on how I can do it better.
I’ll implement that spreadsheet to track my posts straight away!
Cheers!
Bridget
Very good article. Thanks.